A Complete Guide to the Trek to Everest Base Camp
The Everest Base Camp trek has a reputation. It’s often presented as an accessible adventure, a tick-box for the intrepid. This is a serious, high-altitude undertaking that demands significant physical and mental groundwork.
Success here isn't about speed. It's about respecting the mountain environment, understanding the demands of altitude, and moving with a deliberate, disciplined rhythm. This isn't just a long walk; it’s a foundational expedition.
The Reality of the Everest Base Camp Trek
The filtered photos seen online often sanitise the day-to-day reality of the trail. The trek is a demanding physical objective, unfolding over approximately 12 days and covering roughly 130 kilometres (80 miles) on foot.
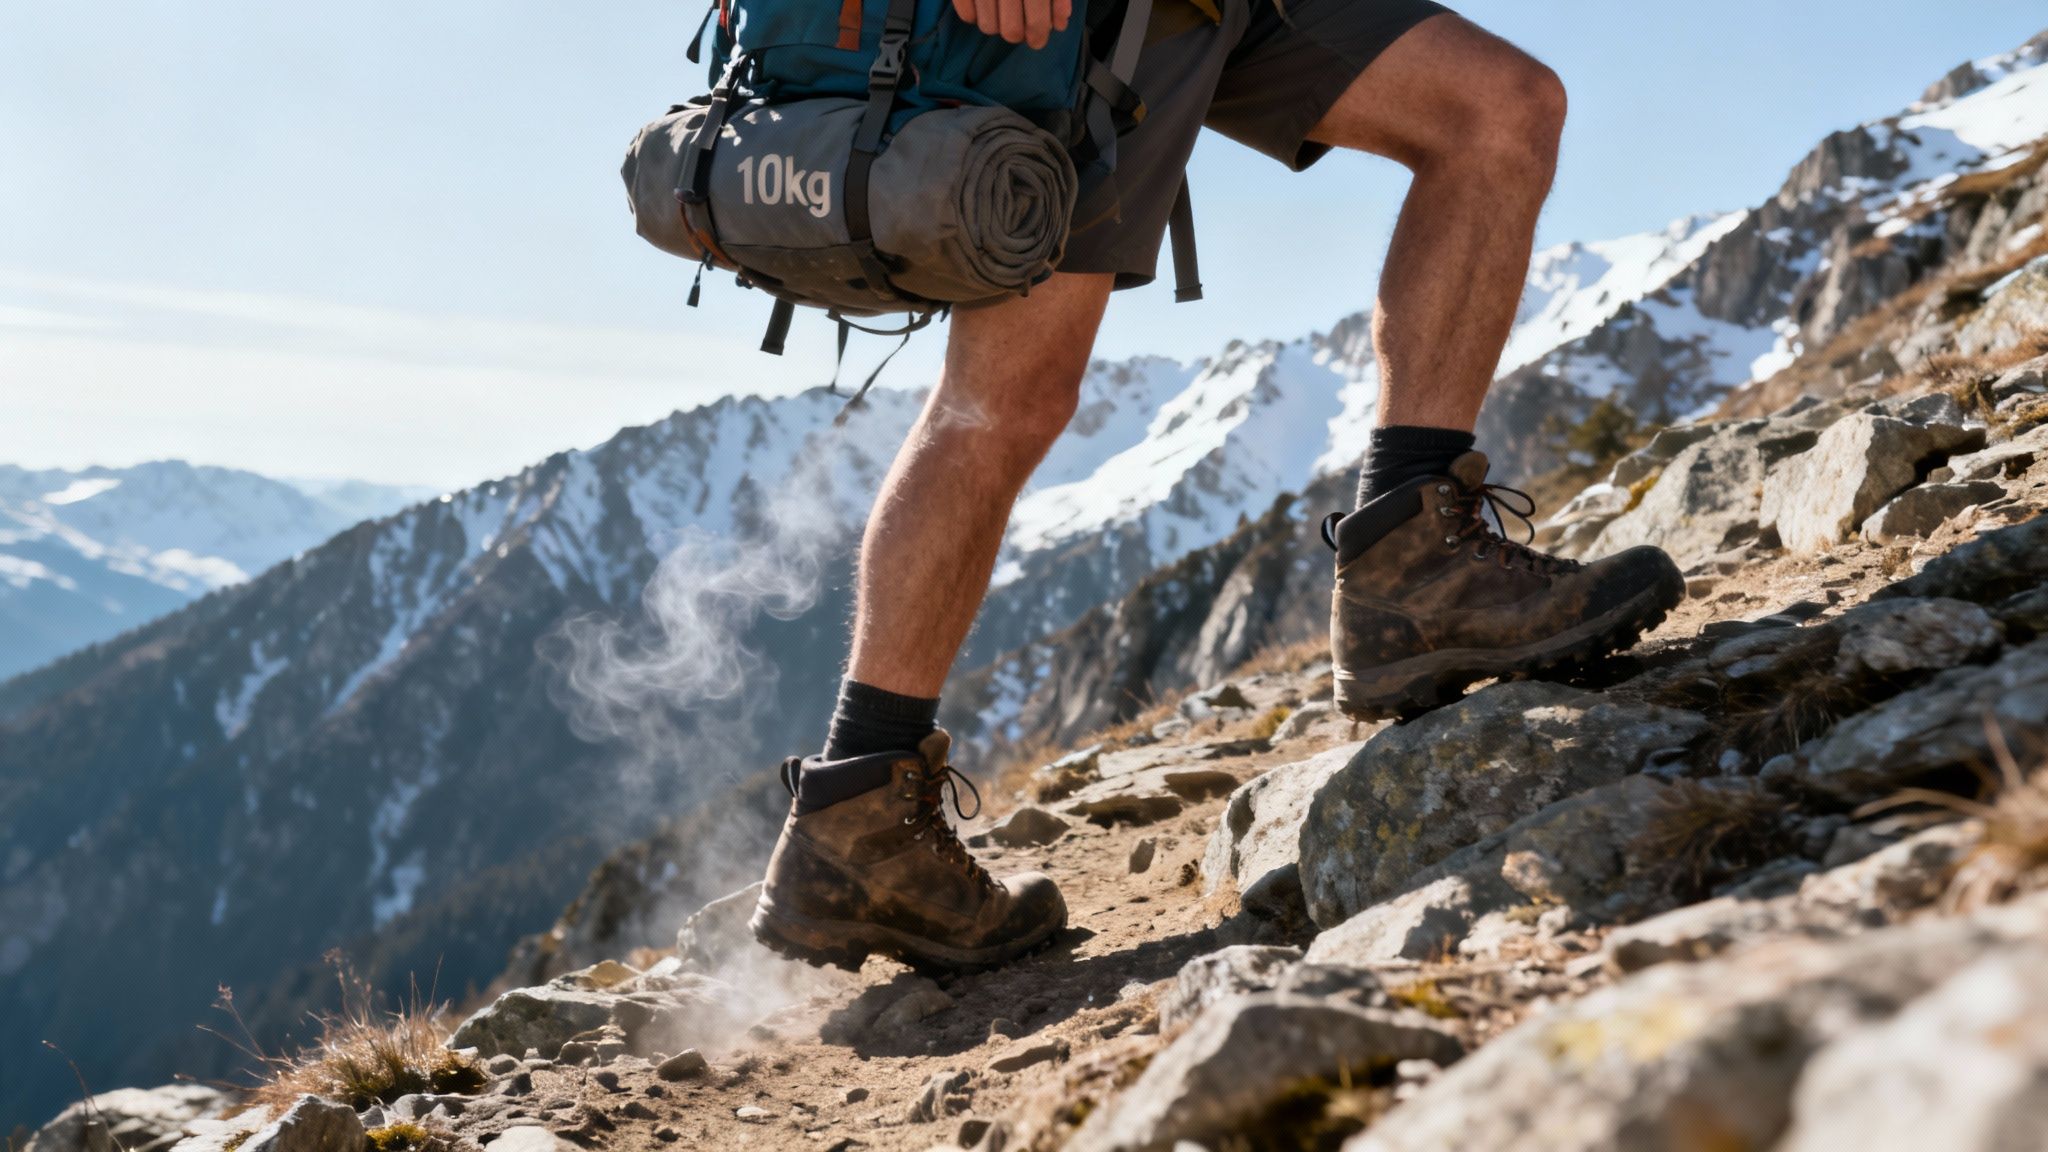
The distance isn’t the primary challenge. The altitude is. You start in Lukla at 2,860 metres and climb to Base Camp at 5,364 metres , where the effective oxygen is nearly 50% of what you’re used to at sea level.
Daily Exertion and Environmental Factors
Expect to be on your feet for 4-8 hours each day, moving over uneven, rocky terrain. To put that into perspective for anyone who’s hiked in the UK, imagine trekking through the Brecon Beacons with a pack, but at an altitude where every step feels like a conscious effort. Your body is under constant physiological stress, working overtime simply to acclimatise.
The environment adds another layer of complexity. You will face:
- Massive Temperature Swings: Days in the lower valleys can be surprisingly mild. But the nights, especially higher up around Gorak Shep ( 5,164m ), can plummet to -15°C or colder, and that’s not only in the depths of winter.
- Basic Facilities: Your accommodation will be simple teahouses. As you gain altitude, they become more rudimentary. Think shared toilets and unheated bedrooms.
- The Khumbu Cough: This is a persistent, dry, hacking cough caused by breathing the cold, dry mountain air. It’s common and needs to be managed carefully.
Assessing Your Readiness
The question isn't "Can I do it?" but "Am I prepared to commit to the process?" A solid baseline of fitness is non-negotiable. You need to be capable of completing back-to-back, full-day hikes whilst carrying a small daypack weighing 5-7kg . This isn't about being a peak athlete; it’s about building robust endurance.
Your preparation has to go beyond the purely physical. It's about cultivating the mental grit to push on when tired, to make sensible decisions when altitude is affecting your judgement, and to know the crucial difference between determination and dangerous stubbornness.
This trek demands respect. It’s an opportunity to operate methodically in a world-class mountain environment and learn the rhythms of expedition life. Approaching it with a clear understanding of its inherent challenges is the first, most critical step towards standing at the foot of the world’s highest peak.
It’s out here you learn not to fight the mountains, but how to live within them.
Mastering the Route and Acclimatisation
Getting to Everest Base Camp isn't about speed. It's about a slow, methodical rhythm that respects the mountain and your body. The itinerary isn't just a schedule; it's your most critical piece of safety equipment, designed to let your body adapt to the dangerously thin air. This is a disciplined process, not a race.
The classic route begins after the flight into Lukla, landing at 2,860 metres (9,383 feet) . From there, the trail dips down before you begin the long, gradual climb that will define the next week and a half. Every day is planned to carefully manage the altitude gain, giving you the best possible chance of acclimatising properly.
The Bedrock of Acclimatisation: Climb High, Sleep Low
This is the mantra of high-altitude trekking. You live by it. The idea is simple: push your body by climbing to a higher altitude during the day, then descend to a lower elevation to sleep. This cycle of stress and recovery is what triggers adaptation.
This principle is most important on your dedicated acclimatisation days. Any responsible EBC programme will have two of these built-in. They are non-negotiable.
- Namche Bazaar (3,440m): After the tough haul up to the Sherpa capital, this stop is your first real test. Most groups complete an acclimatisation hike towards the Everest View Hotel at 3,880 metres , catch that first glimpse of Everest, and then head back down to Namche for the night.
- Dingboche (4,410m): Your second acclimatisation day is even more vital as you push into very high altitude. The typical hike takes you up the ridge towards Nangkartshang Peak, often reaching around 4,800-5,000 metres , before you descend back to the relative comfort of your teahouse in Dingboche.
Do not mistake these for optional side trips. They are essential physiological work for the final push to Base Camp ( 5,364 metres ) and the viewpoint of Kala Patthar ( 5,643 metres ).
The journey follows a simple but critical daily process: walk, face the challenge of the day, and check in with yourself to see if you're ready for the next stage. It’s a constant cycle of effort and adaptation.
This rhythm of effort, assessment, and recovery is what gets you to your goal safely, not just a relentless march uphill.
A Look at a Day-by-Day Itinerary
Weather and trail conditions can always shift your plans, but a 12-day framework provides a proven structure. It’s designed to balance daily distances with safe altitude gains, ensuring you don't push your body too hard, too fast. Here’s a look at what the rhythm of the expedition feels like on the ground.
Sample 12-Day EBC Trek Itinerary
This table breaks down the classic route, giving a clear picture of the daily distances, trekking times, and crucial altitude gains you'll be managing.
| Day | Route | Altitude (metres) | Approx. Distance (km) | Trekking Hours |
|---|---|---|---|---|
| 1 | Fly to Lukla, Trek to Phakding | 2,610m | 8km | 3-4 |
| 2 | Phakding to Namche Bazaar | 3,440m | 11km | 6-7 |
| 3 | Acclimatisation Day in Namche | 3,440m (Hike to 3,880m) | 5km | 3-4 |
| 4 | Namche Bazaar to Tengboche | 3,860m | 10km | 5-6 |
| 5 | Tengboche to Dingboche | 4,410m | 9km | 5-6 |
| 6 | Acclimatisation Day in Dingboche | 4,410m (Hike to 5,000m) | 6km | 4-5 |
| 7 | Dingboche to Lobuche | 4,940m | 7km | 4-5 |
| 8 | Lobuche to Gorak Shep, trek to EBC | 5,164m (EBC: 5,364m) | 13km | 6-7 |
| 9 | Gorak Shep to Kala Patthar, then Pheriche | 4,371m (Kala Patthar: 5,643m) | 13km | 7-8 |
| 10 | Pheriche to Namche Bazaar | 3,440m | 20km | 7-8 |
| 11 | Namche Bazaar to Lukla | 2,860m | 19km | 7-8 |
| 12 | Fly from Lukla to Kathmandu | 1,400m | - | - |
This itinerary is the product of decades of high-altitude experience. Sticking to it requires discipline and an honest awareness of how your body is coping.
For many UK endurance athletes, the EBC trek is an accessible but serious step towards more extreme goals, like Pole to Pole's ocean rows or cross-continental cycle challenges. Data from UK trekking operators shows 87% of British trekkers opt for these time-efficient 10-12 day programmes. With a solid 6-8 weeks of training, they achieve an impressive 95% completion rate.
The trek covers a total of 130km . The day you summit Kala Patthar and descend to Pheriche is significant, covering 13km over about seven hours in incredibly thin air. You can dig deeper into the logistics of shorter treks with our friends at Nepal Hiking Adventure.
The itinerary is your most important piece of safety equipment. The timings and distances are not targets to be beaten, but parameters within which to operate safely. Listening to your body and respecting the acclimatisation schedule is the definition of expedition competence.
Building Physical and Mental Endurance
Let’s be clear: physical readiness for Everest Base Camp is non-negotiable. This isn't about becoming a peak athlete. It's about building robust, mountain-specific endurance that will carry you through day after day of tough walking at high altitude. We’re aiming for resilience, not speed.
You should start your preparation at least three to four months out. This gives your body time to adapt gradually and helps you avoid injury. Your training should stand on three pillars: cardiovascular fitness, functional strength, and specific conditioning for the trek itself.
Creating a Targeted Training Programme
A standard gym routine will not cut it. Your training needs to mimic the exact stresses the EBC trek will put on your body—namely, carrying weight over uneven ground for hours.
- Cardiovascular Endurance: Aim for three to four sessions each week. Think running, cycling, or using a stair-climber. The goal is to build up to 60-90 minute sessions at a pace where you could still hold a conversation. This develops the aerobic base you’ll need to function on less oxygen.
- Functional Strength: Two sessions a week will suffice. Concentrate on compound movements that strengthen your legs, core, and back—squats, lunges, and step-ups are effective. A strong core is everything for maintaining stability on rocky trails with a pack.
- Trek-Specific Conditioning: This is the most important part. Once a week, you need to get out and hike. Start with manageable walks and steadily increase the time and difficulty. Crucially, you must train with a weighted pack, gradually building up to the 8-10kg you’ll likely carry.
What’s the benchmark? You are ready when you can comfortably complete back-to-back weekend hikes, each 15-20 kilometres long, over hilly terrain, all whilst carrying a 10kg rucksack . Nail that, and you have the physical foundation you need. As you're building this up, remember that proper hydration is critical at altitude; take the time to master your hydration strategy before you go.
The Mental Component Under Fatigue
At altitude, physical tiredness gets amplified, and it directly affects your ability to think clearly. Your judgement can become impaired when you need it most. This is where mental preparation becomes every bit as vital as the physical work.
The mountain does not care about your determination. It only responds to good decision-making. Knowing when to push on and when to stop—or even turn back—is the single most important skill you can possess in a high-altitude environment.
Stubbornness is a liability up there. Pushing through a worsening headache or nausea because you want to "tough it out" isn't grit; it’s a dangerous gamble. True expedition resilience is about honest self-assessment. It’s the discipline to tell your guide the moment you feel unwell and the humility to respect their call, even if it’s not what you want to hear.
This isn’t a mindset you learn from a book. It's forged through experience, which is why we put such a huge emphasis on it in our training. To dive deeper into this, you can read more in our article on how to prepare your mind and body for the unknown.
Your Professional Expedition Kit List
On any serious expedition, your gear is an extension of you. Get it right, and it will keep you safe and help you succeed. Get it wrong, and it becomes a liability. Trekking to Everest Base Camp demands a professional approach to your kit—it’s what allows you to function when the environment gets serious.
The entire system is built around one principle: moisture management . At altitude, sweat is the enemy. The moment you stop moving near Gorak Shep ( 5,164m ), any dampness in your clothing will suck the warmth from you. This is precisely why cotton is a complete non-starter. Instead, we build a system of layers, where every piece has a job to do.
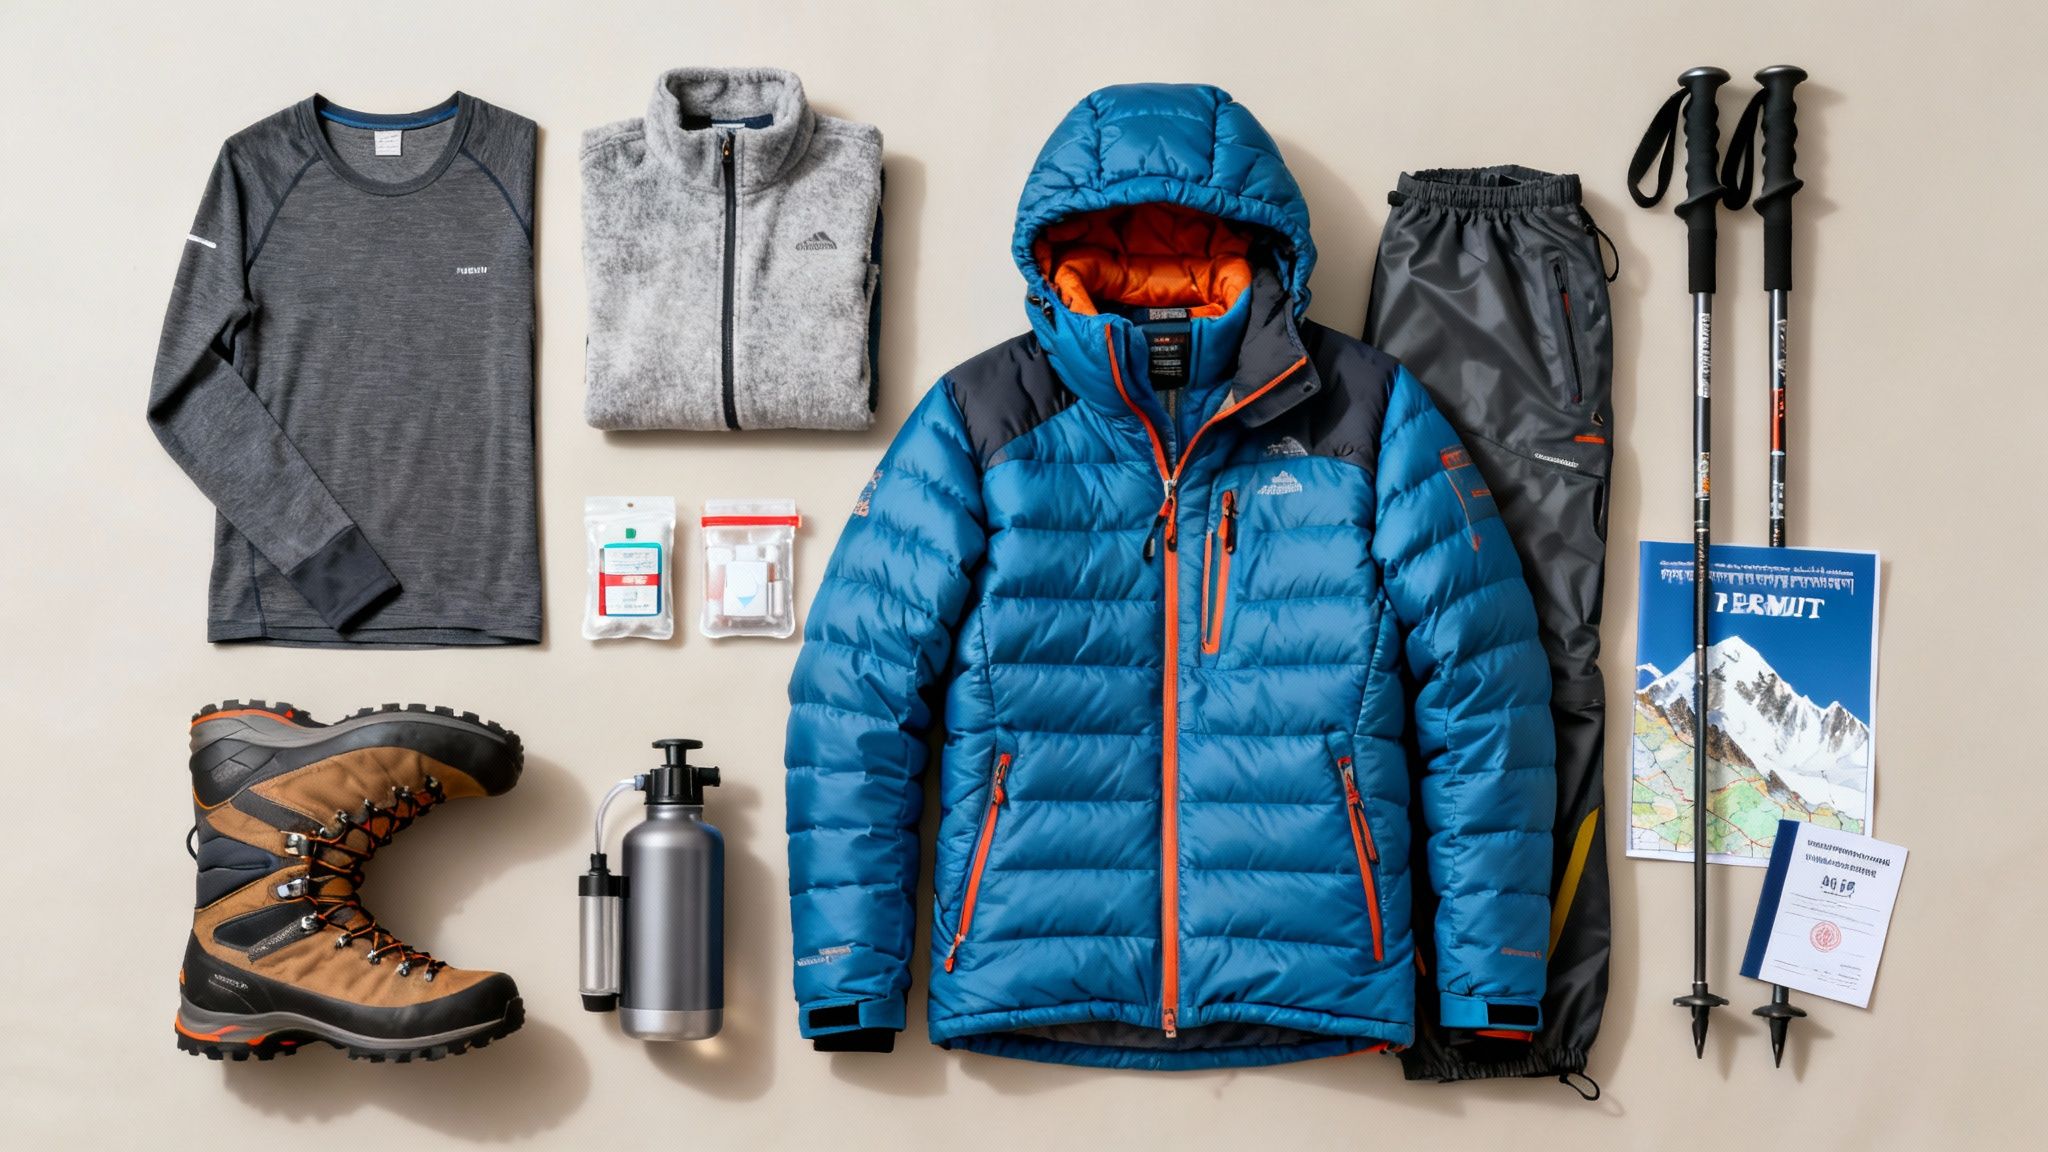
The Layering System
A methodical layering system is your best tool for managing the huge temperature swings on the EBC trek. One minute you're in the relatively mild lower valleys near Phakding; the next, you're facing a pre-dawn chill on the push to Kala Patthar. You need to be able to adapt instantly.
- Base Layer: Think of this as your second skin. Its job is to pull moisture away from your body. Merino wool is unbeatable here. It insulates even when damp and does not smell after days of use. Brands like Icebreaker or Fjällräven are a solid investment.
- Mid-Layer: This is your engine room for insulation. A good quality fleece, like a Polartec 200, is a versatile workhorse you'll live in. For colder sections, you can add a lightweight synthetic insulated jacket over the top to trap more warm air.
- Insulation Layer: This is your defence against the serious cold, usually pulled out during long rests, in the evenings, or on the coldest mornings. A high-quality down jacket with 700-800 fill power gives you an incredible amount of warmth for very little weight. It's indispensable.
- Shell Layer: Your armour against the elements. This layer shields you from wind and snow. A waterproof and breathable jacket and trousers (using Gore-Tex or a similar membrane) are non-negotiable. Arc'teryx makes phenomenal shells, but they come with a significant price tag.
The most important takeaway here is about getting the basics of layering right. The table below breaks down how each piece works together to keep you warm, dry, and performing at your best.
EBC Layering System Breakdown
| Layer Type | Primary Function | Material Example | Recommended Item |
|---|---|---|---|
| Base Layer | Moisture Wicking | Merino Wool | Long-sleeve merino top & bottoms |
| Mid-Layer | Active Insulation | Polartec Fleece | Full-zip fleece jacket |
| Insulation Layer | Static Warmth | Down or Synthetic Fill | 800-fill down jacket |
| Shell Layer | Weather Protection | Gore-Tex / eVent | Waterproof jacket & trousers |
Mastering this system isn't just about having the gear; it's about knowing when to use it. That constant, minor adjustment is what separates experienced trekkers from novices.
We operate on the principle of being proactive, not reactive. Add a layer before you get cold; remove one before you start to sweat heavily. This constant, minor adjustment is a hallmark of an experienced trekker and is fundamental to managing your energy.
Footwear And Essential Trekking Gear
Your feet are your most critical asset. Do not cut corners here.
You need a pair of sturdy, well-broken-in trekking or mountaineering boots with solid ankle support. Brands like La Sportiva, Scarpa, or Meindl are the gold standard for a reason. Make sure they are fully waterproof and that you’ve walked miles in them wearing the exact socks you'll bring to Nepal. Blisters can end a trek, and they are almost always preventable.
Beyond your boots, a few other items are essential:
- Trekking Poles: These are not optional. They save your knees, especially on long descents, and offer critical stability on loose, uneven ground. Look to brands like Black Diamond or Leki.
- Head Torch: For early morning starts and finding your way around the teahouse after dark, a reliable head torch is key. The Petzl Actik Core is a good option. Always carry spare batteries.
- Water Purification: Buying bottled water is wasteful and unsustainable. A better system is a Steripen, a filter bottle like the Grayl GeoPress, or simple purification tablets. You need to be drinking 3-4 litres a day, so have a solid plan.
Medical And Personal Items
A well-stocked personal first-aid kit is another non-negotiable. Your guide will have a comprehensive team kit, but you need to be self-sufficient with the basics. This means blister treatments (Compeed is excellent), painkillers like Ibuprofen, antiseptic wipes, plasters, and any personal medication you rely on. It's wise to talk to your doctor about Diamox (acetazolamide) as a potential aid for acclimatisation before you leave.
Ultimately, your choice of equipment has a direct impact on your ability to stay resilient when things get tough. To dig deeper into this idea, you can read our thoughts on packing resilience and the essential equipment that supports you on any expedition.
Right, let's get the logistics sorted. A successful trek to Everest Base Camp is as much about careful planning as it is about physical grit. Getting the paperwork and choosing the right team are foundational – get these wrong, and the whole trip is at risk.
Think of it as the framework for your entire expedition. You can’t just show up and hope for the best.
Getting Your Permits in Order
The bureaucracy is straightforward once you know the process. There are two essential permits every trekker needs, but you cannot get them in Kathmandu before you fly. You have to pick them up on the trail.
Your first stop is in Lukla. This is where you’ll buy the Khumbu Pasang Lhamu Rural Municipality Permit . It costs NPR 2,000 , which is about £12. Keep it somewhere safe; you'll be asked to show it at checkpoints along the way.
The second permit is for the Sagarmatha National Park . You’ll get this at the park entrance, just after you pass through the village of Monjo. This one costs NPR 3,000 (roughly £18). If you have a guide, they’ll usually sort out the paperwork, but it's your job to have the cash ready and double-check everything is correct.
What Does the Everest Base Camp Trek Cost?
Budgeting for a trip like this needs a dose of reality. The costs can swing wildly depending on how you do it, but any professionally run trek will have a few core expenses you cannot avoid.
- Flights: The return flight from Kathmandu to Lukla is a big one. Expect it to be in the region of £350-£400 .
- Guide and Porter: A good guide will cost you £20-£25 a day, and a porter around £15-£20 a day. This is not the place to cut costs. Their experience is your lifeline.
- Food and Lodging: Plan for about £30-£40 per day to cover your teahouse room and three meals. Remember, the higher you go, the more expensive things get.
- The Extras: Do not forget to factor in money for things like hot showers, charging your phone, buying bottled water, and, of course, tips for your crew at the end.
For a well-supported, safe, 12-day trek, a realistic budget is somewhere between £1,500 and £2,500 per person. That's excluding your international flights and personal kit, but it reflects the true cost of operating safely and ethically in such a remote place.
How to Choose a Reputable Operator
This is the single most important decision you'll make. It’s what separates a professional, safe expedition from a risky, budget trip that could end badly.
The popularity of the EBC trek has grown, especially amongst Brits. Recent data from the Nepal Tourism Board shows that over 4,500 British trekkers entered the park for the trek, a 15% jump from the previous year. You can read more about this trend and its implications on TravellingTrekker.com. With more people on the trail, choosing a competent, professional operator has never been more critical.
When you’re vetting an operator, your questions should be laser-focused on safety, guide qualifications, and porter welfare. A professional outfit will not hesitate. They’ll have immediate, clear answers about their evacuation plans, how their staff are trained, and their commitment to ethical employment.
A cheap operator is cutting corners somewhere. In the Khumbu, those corners are almost always safety standards and how they treat their staff. Make sure your chosen company is government-registered, provides proper insurance for its team, and has a solid, proven track record. This kind of due diligence is a non-negotiable part of any serious expedition, a principle we dive into much deeper in our guide to the lessons of expedition planning.
Your EBC Trek Questions, Answered
Even with the best plan, you're going to have questions. Here are a few of the most common ones we hear from trekkers, answered with the practical advice that comes from years on the trail.
When Is the Best Time to Trek?
The mountains set the timetable, not us. You have two main windows: pre-monsoon ( March to May ) and post-monsoon ( late September to November ). Each has a different feel.
Pre-monsoon is warmer, and you get the buzz of seeing Base Camp alive with international teams preparing for their Everest summit bids. The trade-off? The air can be hazy, sometimes softening long-range views.
Post-monsoon, on the other hand, is known for its crystal-clear, pin-sharp mountain panoramas. The skies are often a deep, piercing blue. The catch is the cold. It gets seriously frigid, especially at night and up high around Gorak Shep ( 5,164m ), where you can expect temperatures dropping well below freezing.
As for the other months? Winter (December to February) is only for those prepared for extreme cold. The monsoon (June to September) is best avoided—think relentless rain, leeches, and zero visibility.
How Seriously Should I Take Altitude Sickness?
Very. Acute Mountain Sickness (AMS) is a real, significant, and potentially lethal risk on this trek. It’s not about fitness; it’s about how well you acclimatise. Pushing too high, too fast is the classic mistake.
AMS isn’t a sign of weakness; it’s a physiological response to being at altitude. The biggest mistake is to ignore the early symptoms and push on. How you recognise and react to those signs is what makes you a competent high-altitude trekker.
Prevention is a discipline. It means:
- A Slow Ascent: Stick religiously to a proper acclimatisation schedule. No exceptions.
- Hydration: This is non-negotiable. Aim for 3-4 litres of water every day.
- Pacing: Walk at a slow, deliberate rhythm—a "Sherpa pace"—that you can keep up all day without getting breathless.
- No Alcohol: Alcohol and altitude are a bad mix. It dehydrates you and can mask the early symptoms of AMS.
You have to learn to recognise the early warning signs: a persistent headache, nausea, dizziness, or unusual fatigue. If you feel any of these, you do not go higher. Period. If they get worse, the only cure is to go down. Immediately. A good guide is trained to spot these signs, often before you notice them yourself. Some trekkers talk to their GP about using Diamox (acetazolamide), but remember it's an aid, not a substitute for proper acclimatisation.
Do I Need a Guide and Porter?
Whilst you can technically trek to EBC on your own, hiring a local, certified guide and porter is the correct way to do it. This isn't just about convenience; it's about safety and responsibility.
Your guide is your lifeline. Their knowledge of the terrain, the weather, and—most crucially—how to manage altitude sickness is an invaluable safety net. When you’re tired and your own judgement might be impaired, they’re the clear head making the right calls.
Having a porter carry your main pack transforms the experience. It frees you up to enjoy the walk, soak in the views, and focus your energy on moving your own body up the trail. More importantly, hiring local staff means your money goes directly into supporting the Sherpa communities whose home you are walking through. It’s the responsible, ethical choice.
What Are the Teahouses Actually Like?
The teahouses are the heart of the Khumbu. These are family-run lodges that provide simple but essential shelter and food along the route.
Do not expect luxury. Rooms are basic, usually with two wooden beds and a mattress. The higher you get, the more rustic things become. Shared toilets are standard, and bedrooms are unheated, so your sleeping bag becomes your best friend. The hub of any teahouse is the communal dining room, which is almost always heated by a pot-bellied stove burning dried yak dung. It’s where everyone gathers in the evening to eat, share stories, and thaw out.
Food is simple, hearty, and carb-heavy—exactly what your body needs. You’ll become familiar with Dal Bhat, the national dish of rice, lentil soup, and curried vegetables. It's tasty, filling, and you can usually get endless refills. A good tip is to stick to cooked vegetarian meals to minimise the risk of stomach bugs. You can buy bottled water, but it's expensive and creates a lot of waste. A better plan is to bring your own water filter or purification system, like a Steripen.
At Pole to Pole , we know that a successful expedition is built on a foundation of expert knowledge and meticulous preparation. The trek to Everest Base Camp is an incredible objective, and our team is here to ensure you are ready for the challenge. Explore our training programmes and guided journeys to begin your next adventure. https://www.poletopole.com